Basics of printing labels in SciNote Premium
![]() 4 min read
4 min read
With SciNote, you can print labels for your samples, and reagents to label tubes, plates, racks, or other containers that hold them. As long as your item exists as an Inventory item in SciNote (including instruments), you can print a label for it.
In this blog post, we will go through the steps of printing labels in SciNote, so you can easily keep things organized in your lab.
A free trial period is available to SciNote Premium users for a month per request. Talk to our team if you want to secure promotional pricing on this feature!
Content
What do you need to print labels?
To start printing labels in SciNote, you will need:
- A label template that determines the layout and content of the label (essentially what will be printed on the labels).
- A label printer with which you will be printing labels. This can be a local printer (connected via USB) or a network printer. SciNote supports Fluics and selected Zebra label printers.
- An inventory item stored in one of your SciNote inventories for which you will be printing labels.
Don’t have SciNote yet?
Choose the perfect plan for your lab:
Label templates
Label templates determine which inventory item-related data will be printed on the label. You can include the following item information that’s stored in SciNote:
- Item name
- Barcodes and QR codes that encode Inventory Item ID or other data
- Inventory Item ID
- Information from custom columns that you added to your inventory. The data from column types that are supported include Text, Number, Date, Date & Time, Dropdown, Status, and Stock. This means you can print information such as concentration, due date, remaining stock, and location.
Label templates in SciNote are listed in the “Templates/Label templates” section.
When starting to use label templates you will have one default label template for your Zebra or your Fluics printer available in your label templates library.
Using label templates you can design different labels that suit your purpose. For example, you can have different labels for samples, reagents, specimens, and instruments, each with specific information on the labels. Or, you can create label templates with different dimensions that fit small tubes, plates, racks, or large bottles, depending on your needs.
Designing label templates
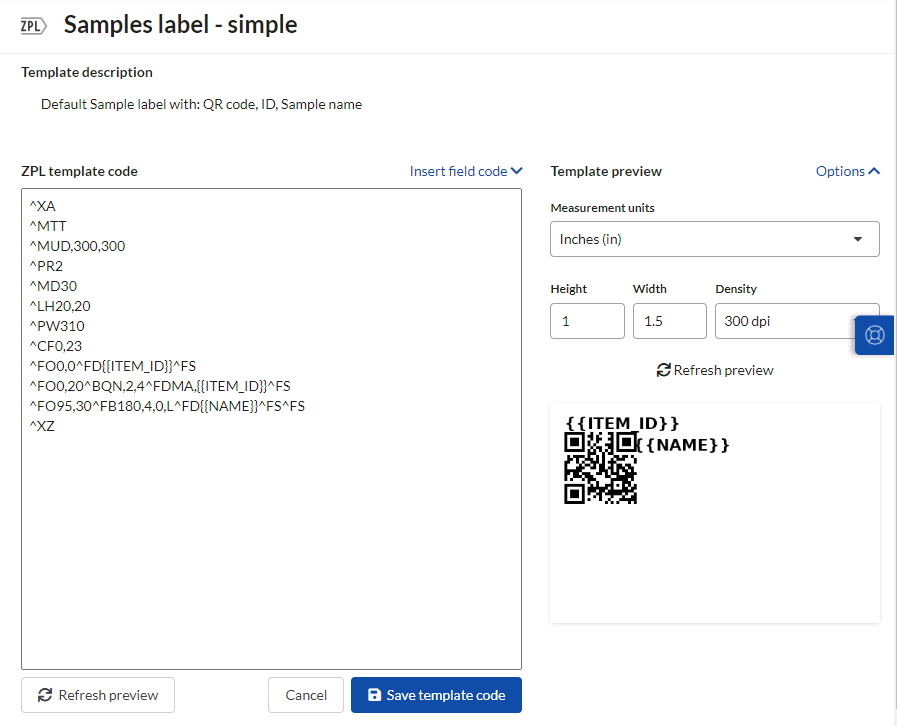
The easiest way to design a new label template is to use label design tools such as ZebraDesigner Essentials 3 (freely available via Zebra) and ZebraDesigner Professional 3 or similar label design tools. These specialized third-party tools have user-friendly interfaces that will help you come up with your label design without you having to learn Zebra Programming Language (ZPL) code. They will output the template in ZPL code that you can copy into SciNote directly.
You can create labels that include different information from SciNote inventory items, or add barcodes, QR codes, images (e.g. logos, warning icons), shapes and static text to labels. Once you have the ZPL code in SciNote, you can tweak it further and preview the label before printing it.
Note that ZebraDesigner software is not compatible with macOS. Consult your IT administrator on how you can run the software with your Mac computer (e.g., using a virtual machine), or use another label design software that is capable of outputting ZPL files.
How to design a new label template using ZebraDesigner Essentials 3?
Label printers
Label printing in SciNote is based on ZPL. SciNote supports some models of Zebra label printers and Fluics label printers. Learn how you can connect SciNote to:
Printing labels for Inventory items
Once you have the desired label template and a label printer connected, printing labels in SciNote is easy.
1. Navigate to your Inventory, select one or more inventory items, and click “Print label”.
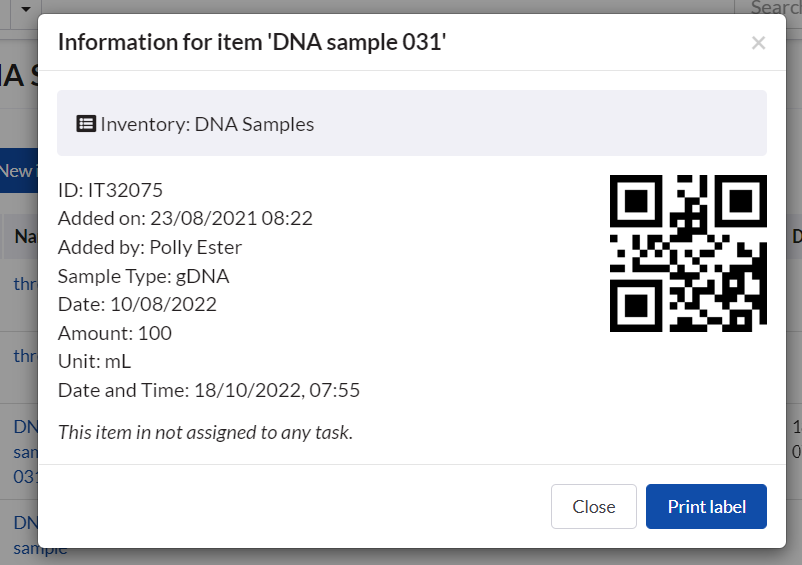
2. You can also print labels for a single item directly from its item card. Open item card by clicking on the “Item name” in “Inventory”, “Assigned Items” screen or from Items mentioned in text (smart annotated Items). Click “Print label”.
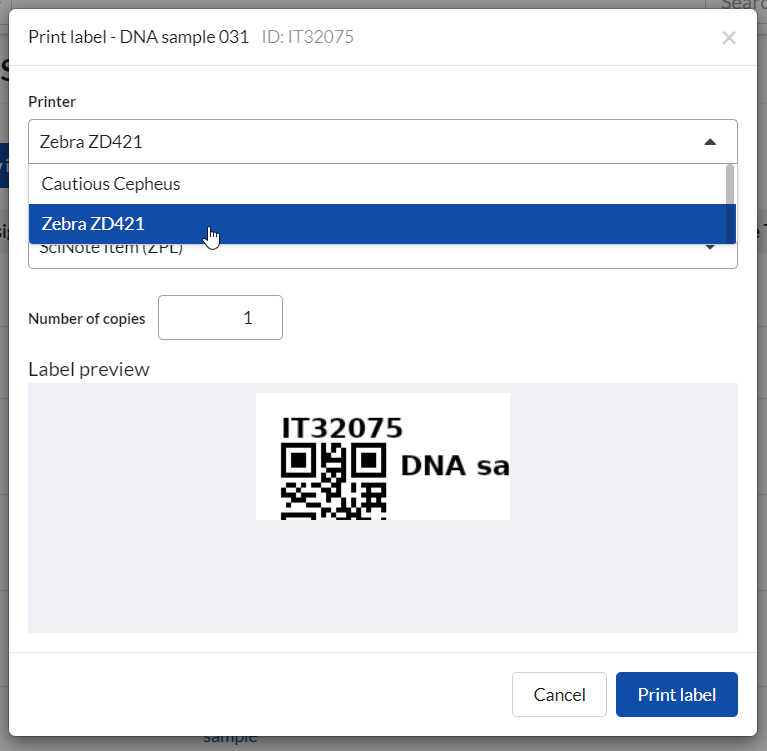
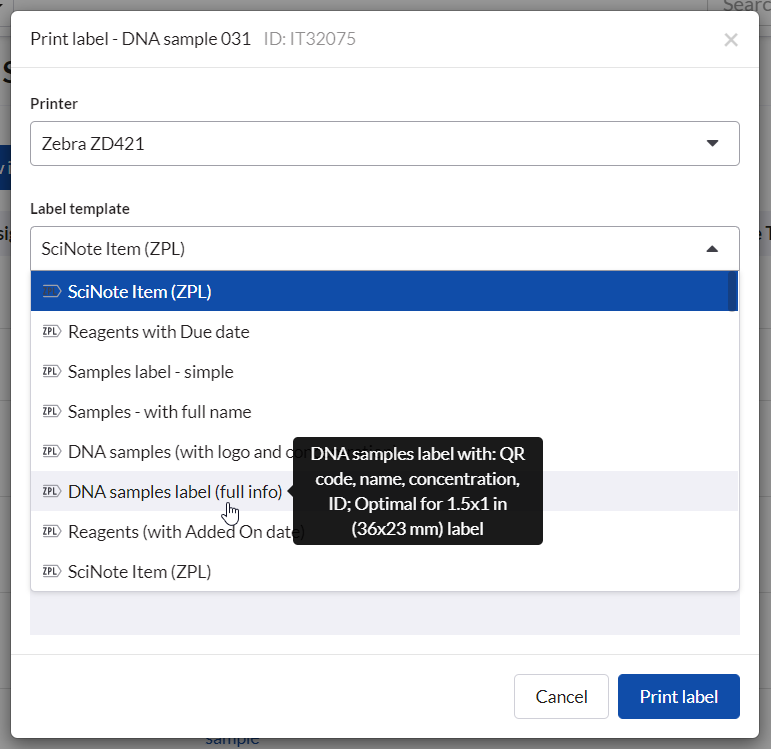
3. Select the printer and add the number of label copies to print.
4. Select the desired label template and click “Print label”. That’s it.
This is how you can quickly print labels for any inventory item, whether it’s a sample, specimen, reagent, instrument, or something else. Remember that you will need to have your label printer connected to your SciNote account through your computer Nor network in order to print labels.
Now that you know how to create custom labels, give it a try in your SciNote Premium account. A free trial period is available per request for a month. Talk to our team if you want to secure promotional pricing on this feature!
Which Zebra printers are compatible and how to connect them with SciNote?
How to connect a Fluics printer with SciNote?
